This article is written intended to guide you how to Install Microsoft Visio Mac / MacBook Pro / MacBook Air running OS X El Capitan.
One program that missing when using MacBook is there is no Microsoft Visio for Mac. Although Microsoft has been officially releasing Microsoft Office (e.g Word, Excel, PowerPoint) for Mac, Microsoft still does not release Visio for Mac, at least until now.
Since I work as a network administrator, Microsoft Visio is very important for me to draw network diagram / topology. Although there are many Visio alternatives for Mac such ConceptDraw, LucidChart, SmartDraw, or OmniGraffle according to my opinion they can not replace Visio. It is the best because of its simplicity and easy to use. Another reason is I am already familiar with Visio when running Windows and also already bought the software license so buying another program for this purpose is wasting money.
In this article I will not talk about which software is better. I want to show you how to install Microsoft Visio on Mac running OS X El Capitan on top of Wine, thanks to WineHQ team for making this great tool. It should be applicable on previous version of OS X such as OS X Yosemite, OS X Mavericks, and Mac OS X Mountain Lion.
Lets start with the installation process
Windows programs can be run on OS X, Linux and BSD via WINE (Windows Emulator) so first we need to install wine and winetricks.
We can install wine and winetricks packages using Homebrew, follow this post how to install Wine on OS X.
brew install wine winetricks
Define Visio Home directory
Although it is not necessary, it is better to set environment folder for Visio. We will set it under $HOME/.vision2007. Inside your $HOME directory (/Users/your_username), create .visio2007 directory.
mkdir .visio2007
Perform Wine initialisation and setup of WINEPREFIX in .visio2007
env WINEPREFIX=~/.visio2007 wineboot
We need several packages be installed to run Visio 2007. Those packages are gdiplus, msxml6, dotnet20, riched20, and corefonts. Install them using winetricks as follows:
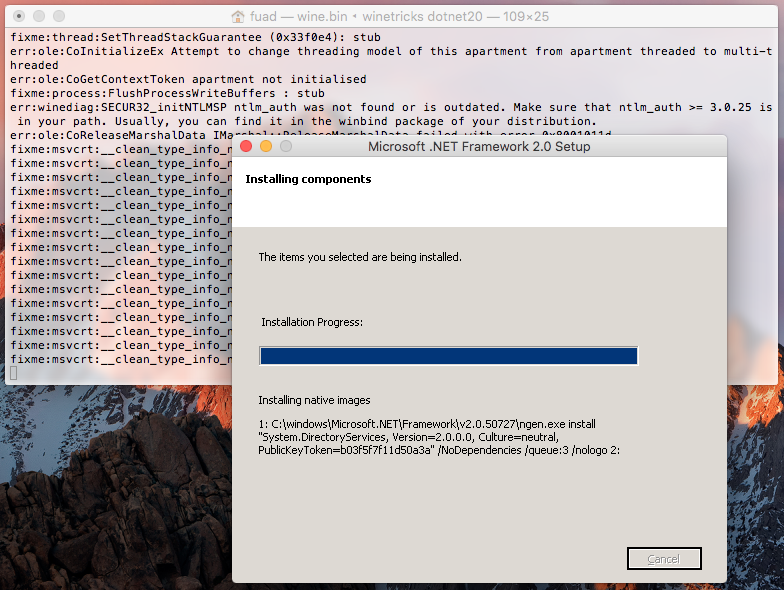
env WINEPREFIX=~/.visio2007 winetricks gdiplus
env WINEPREFIX=~/.visio2007 winetricks msxml6
env WINEPREFIX=~/.visio2007 winetricks dotnet20
env WINEPREFIX=~/.visio2007 winetricks riched20
env WINEPREFIX=~/.visio2007 winetricks corefonts
Capture example of installing .Net Framework (dotnet20) is as in image below:
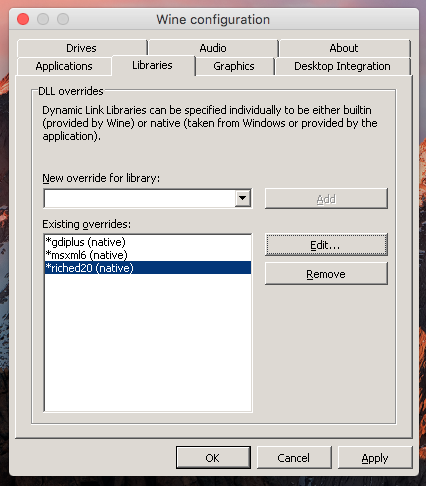
After installing the packages above, then run Wine configuration editor (winecfg)
env WINEPREFIX=~/.visio2007 winecfg
In Wine configuration, under Libraries tab make sure that gdiplus, msxml6, riched20 are set to native. See image below!
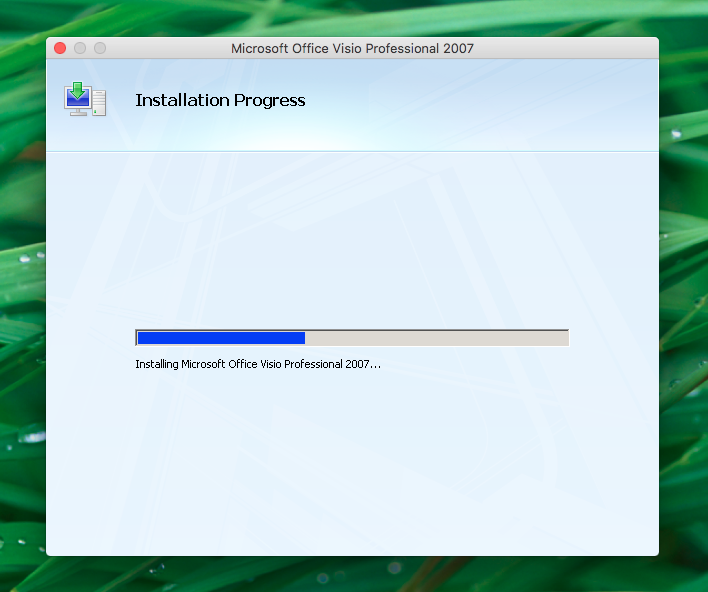
Run Visio setup installation
Once the above dependency packages installed and configured, we are ready to run the installation.
env WINEPREFIX=~/.visio2007 wine /path/to/visio2007/setup.exe
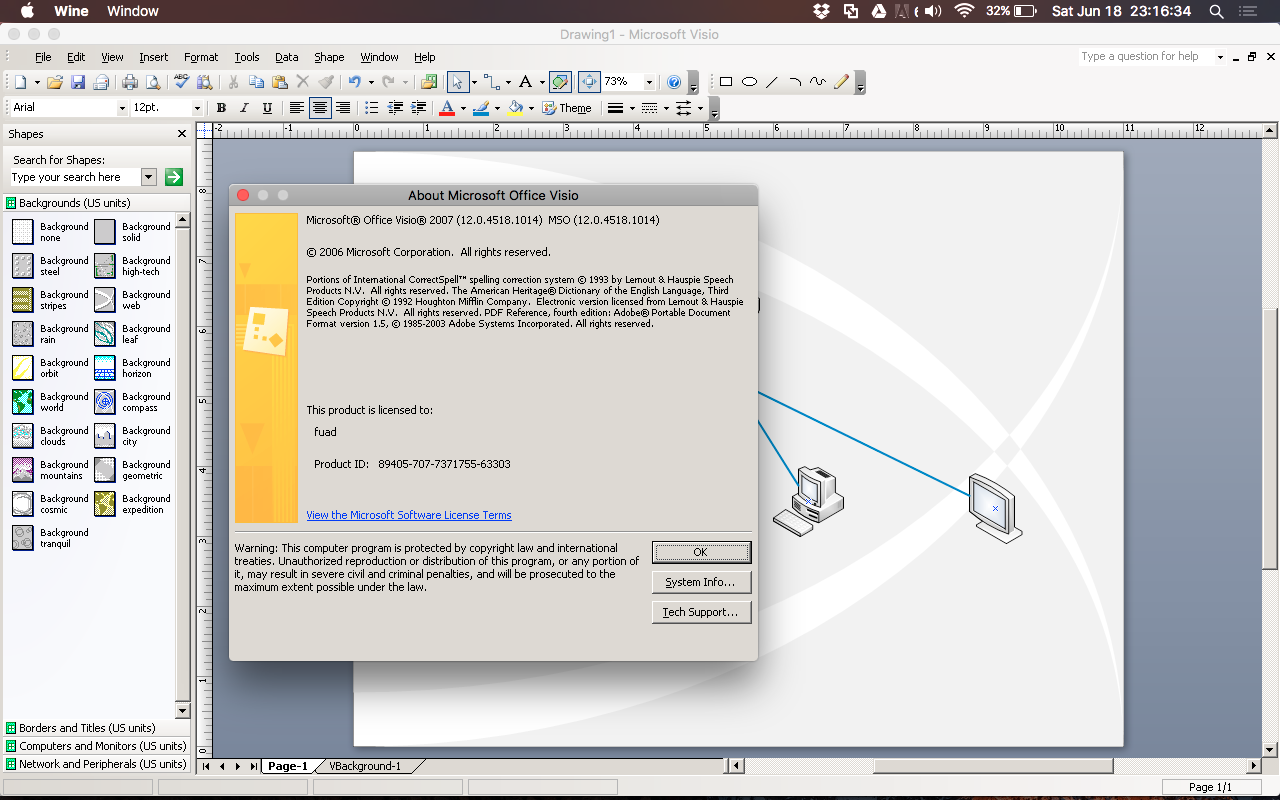
After the installation completed and successful, you can run Visio using command below:
env WINEPREFIX=~/.visio2007 wine ~/.visio2007/drive_c/Program Files/Microsoft Office/Office12/VISIO.EXE
Visio should be running well without any problem.
Create visio script
To make it easier to run Visio using Terminal, create a script named as ‘visio’.
touch visio
vi visio
Copy and paste the following command into the visio script. Change the ‘your-username’ accordingly with yours.
/usr/bin/env WINEPREFIX=/Users/your-username/.visio2007 /usr/local/bin/wine /Users/your-username/.visio2007/drive_c/Program Files/Microsoft Office/Office12/VISIO.EXE &>/dev/null &
Make it executable and then move it into $PATH
chmod +x visio
sudo mv visio /usr/local/bin/
To run Visio, just type visio in Terminal.