I have a MacBook Pro 13” Early 2011 which is still running without any problem until now. The RAM had been upgraded to 8GB and the Apple HDD had been replaced with a Corsair Force GS SSD 240GB as the main disk. The SuperDrive was removed and replaced with Apple HDD by using an OptiBay or HDD Caddy. It has been running perfectly for more than 2 years.
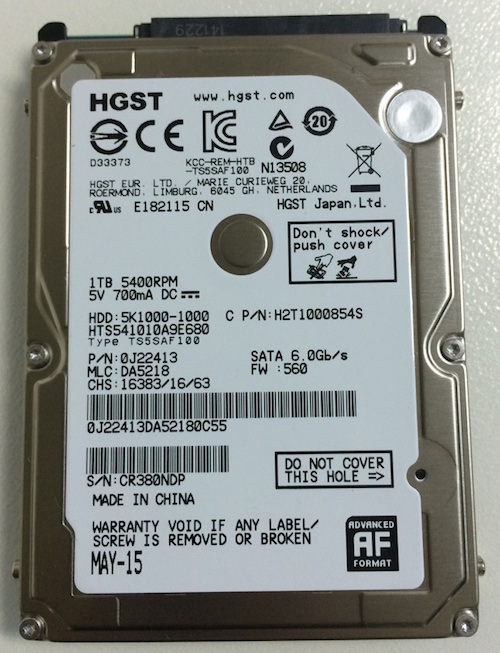
As the Apple HDD is only 320GB capacity, its free space is almost running out now so I decided to buy a new 1TB 2.5” Hitachi Internal Hard Disk (Model: HGST HTS541010A9E680) SATA-3 (6.0 Gbps). I installed it in the OptiBay or HDD Caddy to replace the 320GB of Apple HDD.
When the laptop booted up, I checked the SATA/SATA Express information using System Report / System Information. I could see that both Link Speed and Negotiated Link Speed were 6 Gigabit meaning that the Hitachi disk successfully negotiated using SATA 3 interface. I could format it using Disk Utility without any issue. It seems that the new disk would be working well.
Weird problem starting to happen when I tried to copy data from Apple HDD to the new disk. The disk ejected abnormally by itself while copying the data. I had to reboot the Mac to make the disk shown again. When I tried to repeat to copy the data, the disk again ejected abnormally by itself. There must be something problem, I thought. Then I tried to search on Google using ‘hitachi disk problem macbook pro early 2011’ keyword and found this thread http://forums.macrumors.com/threads/1tb-hdd-early-2011-macbook-pro.1584023/ which concluded that the problem was on the OptiBay SATA-3 interface. OptiBay SATA-3 interface does not work properly but SATA-2 interface does.
To solve the problem, we need to change the transfer speed of Hitachi HDD from 6.0 Gbps (SATA-3) to 3.0 Gbps (SATA-2). I just followed the guide on http://www.mcetech.com/optibay/sata3to2.html which worked perfectly on my MacBook Pro 13” Early 2011. You need to download the disk image and burn it to a CD/DVD. You can use Mac Disk Utility or Windows Burn Disk Image tool to burn the disk image.
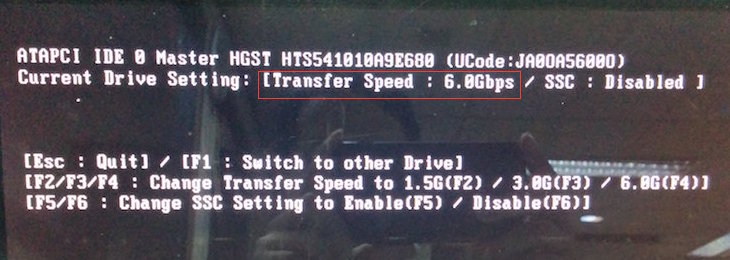
You can see on the image above that the initial transfer speed is set to 6 Gbps (SATA-3).
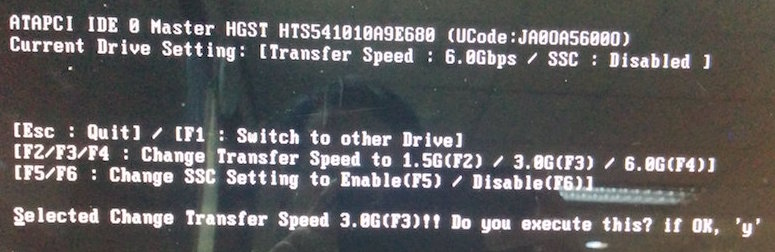
Press F3 to change the transfer speed to 3Gbps followed by pressing ‘y’ to confirm.
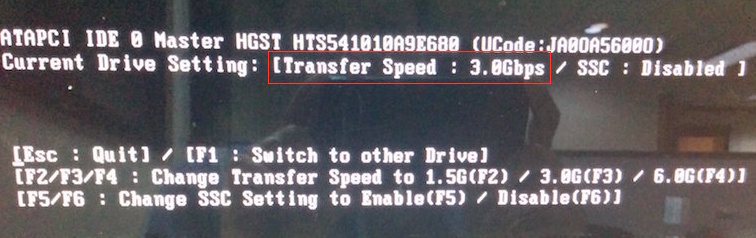
Reboot again to CD/DVD to make sure it has been changed to 3Gbps as above image.
You can also verify using System Information on OS X once it is booted up.
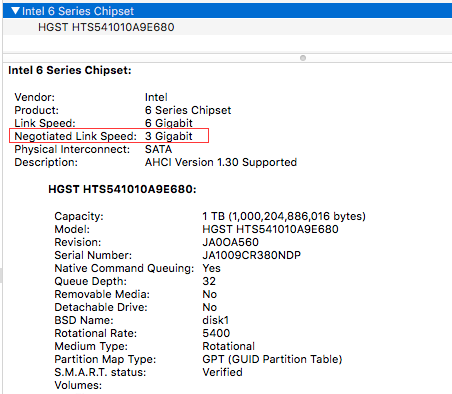
Once the transfer speed changed to 3.0 Gbps, the Hitachi HDD works without any problem so far.