More and more Linux operating system becomes popular especially for geeks, system administrators or developers. Several popular Linux operating systems for desktop are Ubuntu, LinuxMint and Elementary OS. This post will show you how to install LinuxMint 17.3 on MacBook Pro dual-boot with OS X El Capitan. This method should also be applicable for Ubuntu 15.10 and Elementary OS 0.3.2 Freya.
Prepare the partition
We can use Disk Utility to partition our disk. Create around 50GB of disk space for Linux. Set the partition format to MS-DOS(FAT). We can change to EXT4 Linux file system format later in the installation stage.
To make it easier, I have created a video how to partition the disk on OS X El Capitan.
Create Ubuntu / LinuxMint bootable USB Stick Installer for Macbook
We will install the Linux operating system using a USB stick. You need at least 4GB of USB stick. Ubuntu website already provides how to create a bootable USB stick on OS X on this page.
The steps is as follows:
hdiutil convert -format UDRW -o linuxmint-17.3-cinnamon-64bit.img linuxmint-17.3-cinnamon-64bit.iso

diskutil list

diskutil unmountDisk /dev/diskN

sudo dd if=linuxmint-17.3-cinnamon-64bit.img.dmg of=/dev/rdiskN bs=1m

diskutil eject /dev/diskN
To make it easier I have created a video on how to create Ubuntu / LinuxMint bootable USB stick on OS X
Restart the MacBook to boot on USB stick
After successfully create the bootable USB stick, it is time to boot the Macbook to USB stick. Press and hold Option key while booting to go to Mac boot menu. Select the EFI boot disk. If there are two EFI boot disks just select one of them. The Mac should boot into Linux running on USB stick.
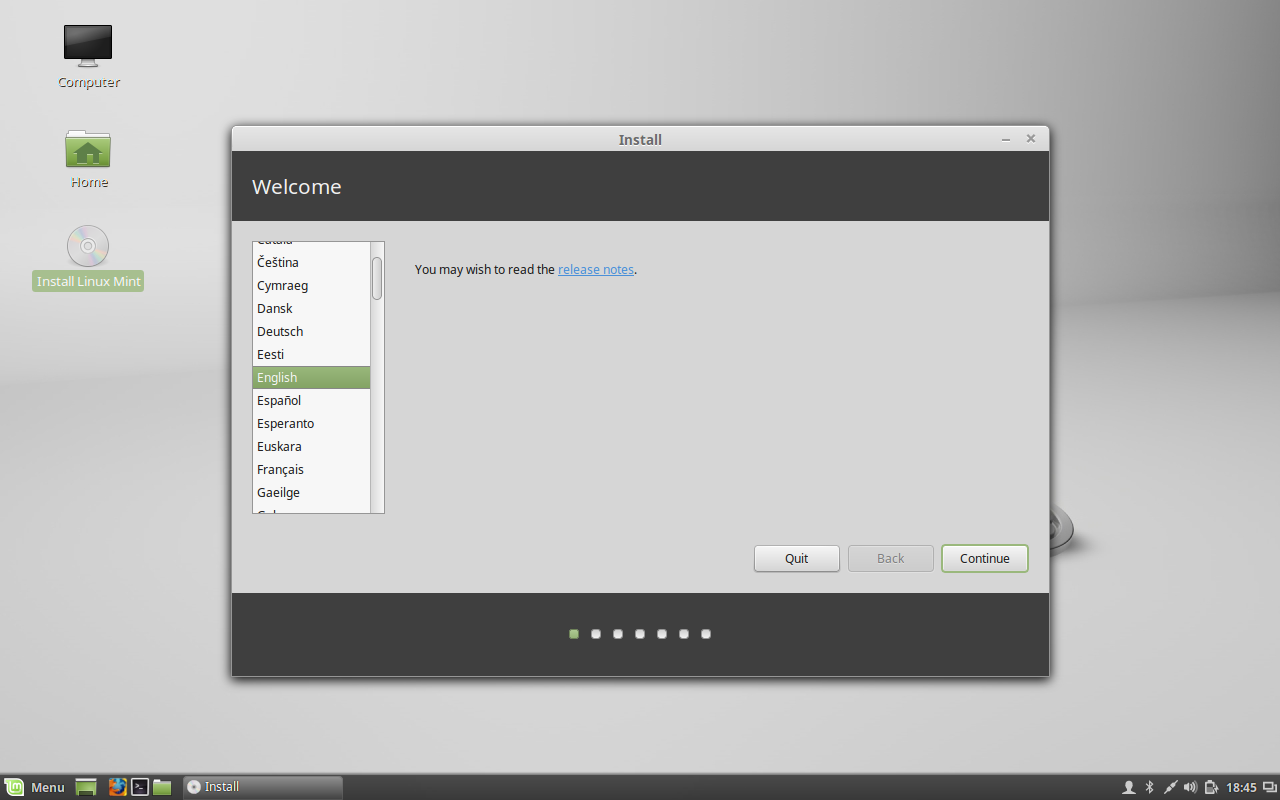
Basically you can run the Ubuntu / LinuxMint / Elementary OS just from Linux. It is called Live USB Linux. You have to always and keep the USB plugged in to run Live USB Linux. If you wish to install it to hard disk, double-click the Install Linux Mint icon in the Desktop. Welcome windows will pop up. Just click Continue to start the installation.
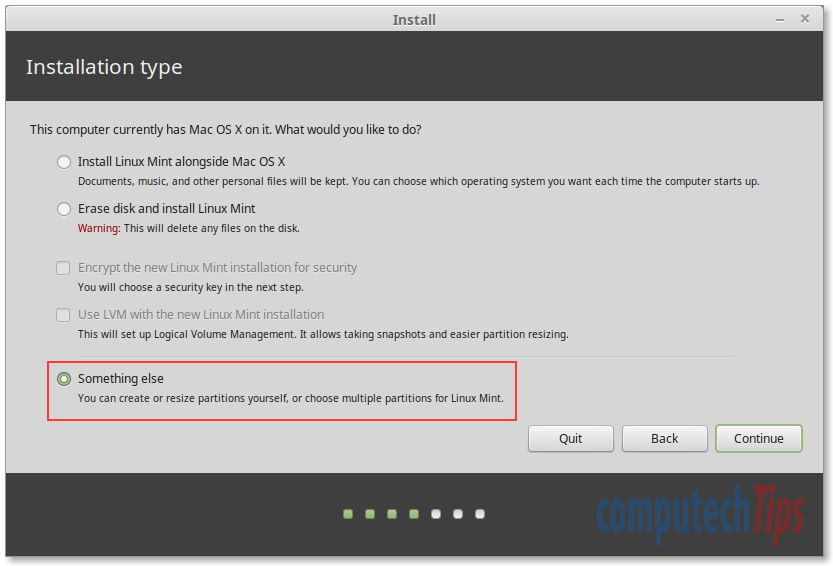
On the ‘Installation type’ step above, choose ‘Something else’. We will install Linux Mint on the partition we have created on the above step. Then click Continue.
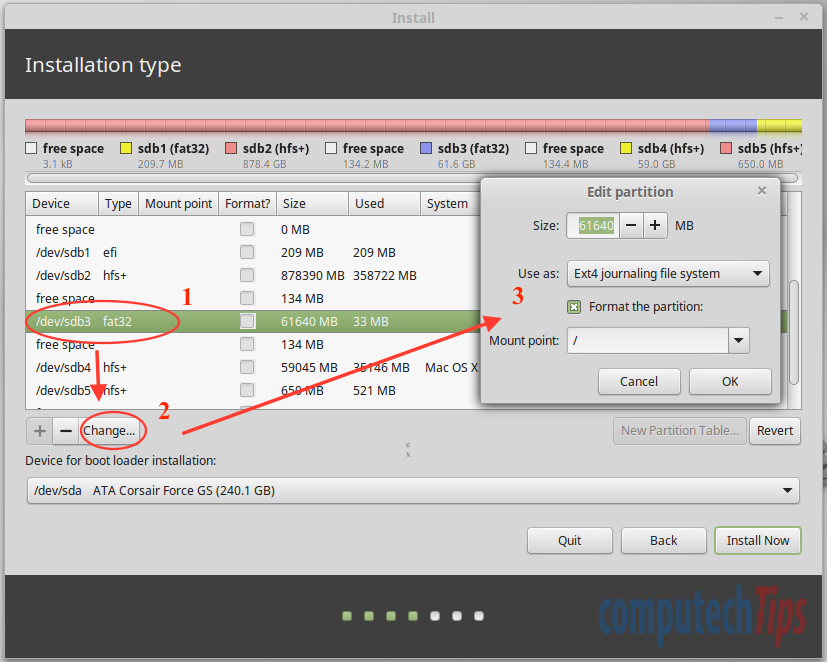
As you can see in the image above, select the partition then click Change to edit the partition. Format it as EXT4 file system and mount it as ‘/’. Click OK and then click Install Now. You may be warned that there is no SWAP space configured at the moment. Just ignore it. We can create swap space later.
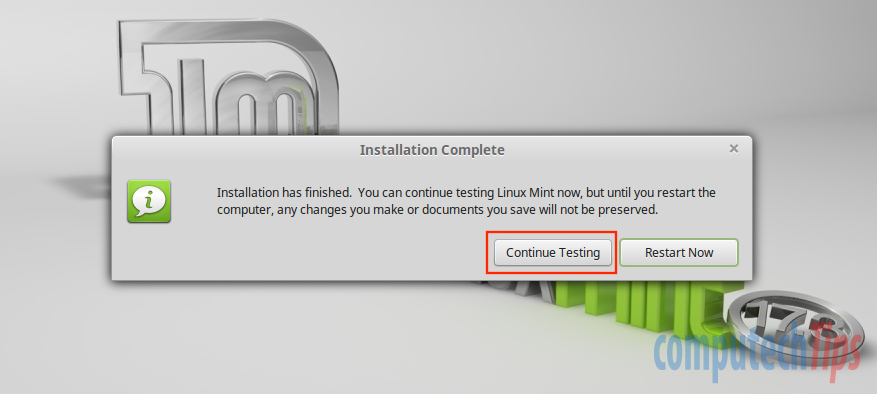
Follow the on screen installation step. Once the installation complete, DO NOT reboot it now. Click Continue Testing. We need to install EFI boot manager, a tool used to modify the Intel Extensible Firmware Interface (EFI) Boot Manager.
Open Terminal program then run the following command to install EFI boot manager.
sudo apt-get install efibootmgr
Then run ‘sudo efibootmgr’ to see current boot status. See the image below for example.
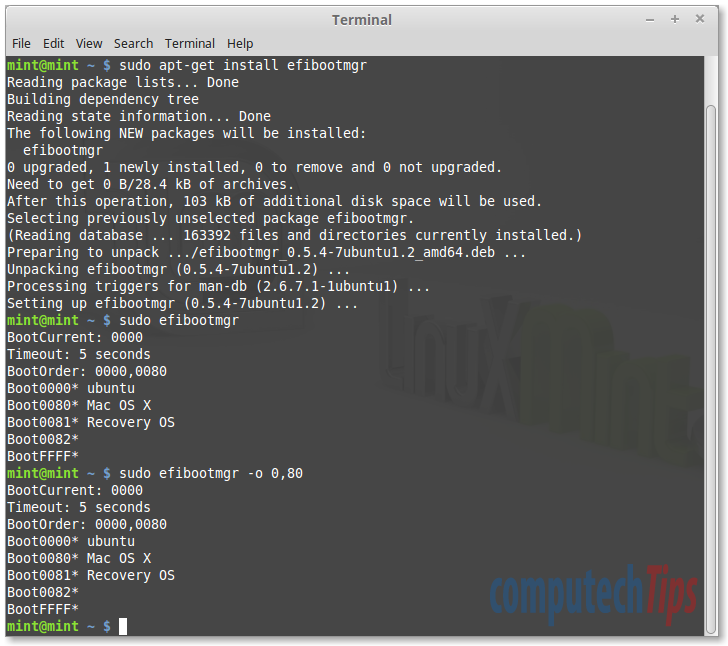
As you can see above, BootCurrent is 0000 which is Ubuntu (Linux Mint is based on Ubuntu). BootOrder is 0000,0080 which means Ubuntu first then Mac OS X. To make sure the boot order is correct, run the following command:
sudo efibootmgr -o 0,80
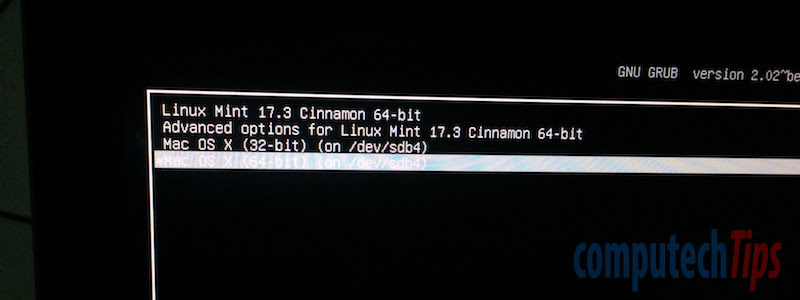
You can now restart the Linux Mint Live USB. You should see Grub boot menu with Linux Mint in the first order.
Post-install configuration
Setting the Grub menu
As you can see in the Grub menu above, the Grub automatically probes and detects other operating systems installed in other partitions. It detects Mac OS X (32 and 64 bit) on /dev/sdb4. Unfortunately when we select it, it does not boot into the system. We need to manually add a menu entry of the OS in /etc/grub.d/40_custom file as follow for example:
menuentry "OS X El Capitan" { exit }
As both menuenty of Mac OS X (32-bit) / (64-bit) (on /dev/sdb4) do not work, we need to remove it by disabling the Grub probe option. It can be done by simply make the file /etc/grub.d/30_os-prober not executable.
sudo chmod -x /etc/grub.d/30_os-prober
Then re-run the update-grub
sudo update-grub
Restart to see the new Grub menu as follows:

Install Wireless / WiFi driver
The wireless is not detected by default. We need to install the wireless kernel driver as follows:
sudo apt-get install bcmwl-kernel-source
Macbook Pro is using Broadcom BCMxx for the wireless firmware so we need to install it as above.