
On this post I am going to show you how to setup L2TP VPN macOS Sierra. It should be also applicable on the previous version of OS X such as El Capitan, Yosemite, and Mavericks.
If you upgraded your Mac to macOS 10.12 Sierra or your iPhone to iOS 10 you might be surprised that PPTP client is not on the list when adding VPN interface. Apple will no longer support PPTP client starting from macOS Sierra and iOS 10. Alternatively you can switch to use L2TP VPN over IPSec which offers better and more secure connection.
In previous post I have shown you how to configure Mikrotik as an L2TP VPN server. We will use the account configured on the Mikrotik as the login account.
The step by step how to setup L2TP VPN macOS Sierra
Follow the below step by step on how to setup L2TP over IPSec on macOS Sierra
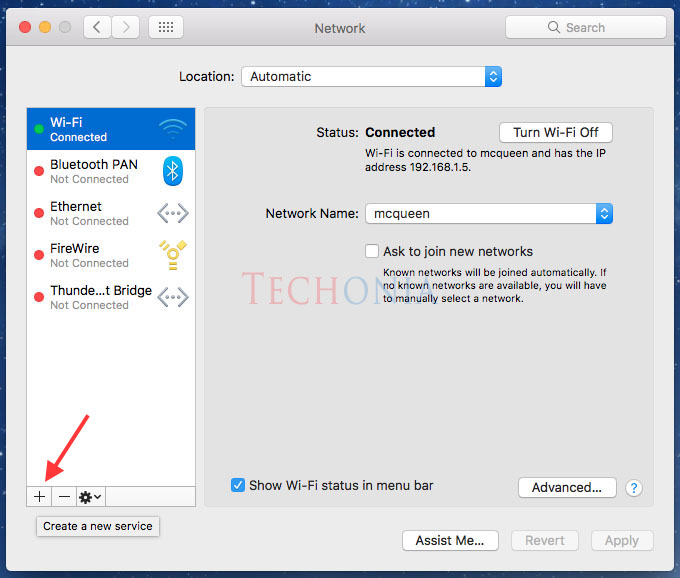
1. Open System Preferences then select Network
In the Network settings, click the + (plus) button to create a new service (we will create a new VPN service)
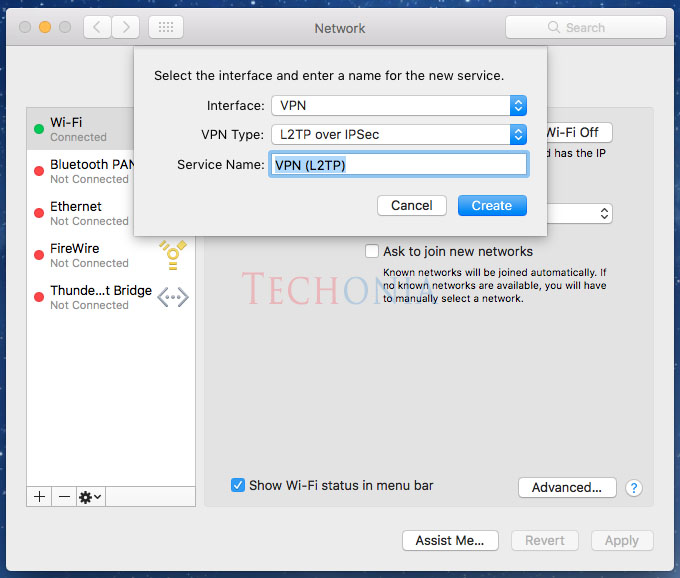
2. Select the interface for the new service
To create a new VPN service, configure the interface as below;
Interface: VPN
VPN Type: L2TP over IPSec
Service Name: choose a name for this new service. By default the name should be VPN (L2TP)
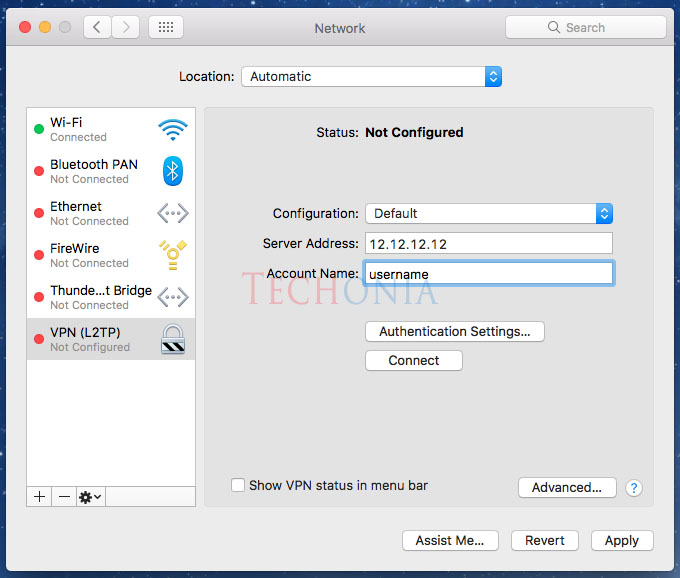
3. Enter the VPN server address and your account
Make sure the L2TP VPN server has been correctly configured. If you use Mikrotik, you can follow my previous post on how to configure Mikrotik as L2TP VPN server.
Server Address: the IP address of your L2TP server
Account Name: your login name to your L2TP server
4. Configure the Authentication Settings
Click on the Authentication Settings to configure auth and machine authentication.
Password: the password of your PPP secret
Shared Secret: the IPSec shared secret

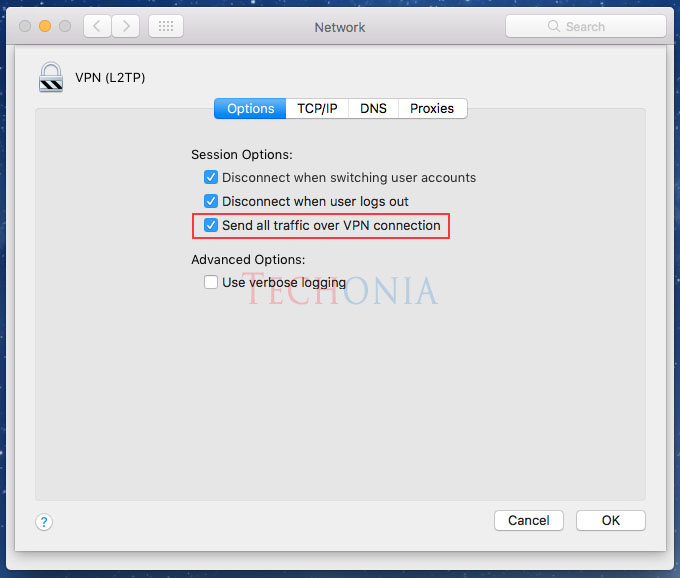
5. Click Advanced button
Make sure that the ‘Send all traffic over VPN connection’ is checked. Then click OK button. Complete the setting by clicking Apply button.
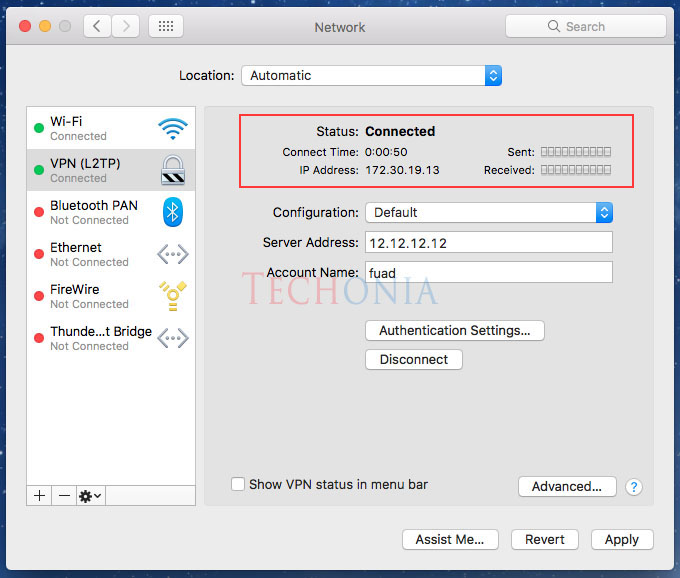
6. Connecting to L2TP VPN server
To connect to the VPN server, click the Connect button just under the Authentication Settings. Once it is connected, you can see the connection status, the connect time, and the IP address assigned to your Mac.
I hope this post can help you on how to setup L2TP VPN on macOS Sierra.


Great tutorial
Mine is all set up just as you mentioned but keeps coming up with The L2TP-VPN server did not respond. Try reconnecting. If the problem continues, verify your settings and contact your Administrator. How do I fix this?
What version of RouterOS you use? I had tested that some version worked, some did not work. I use version 6.38.5 and 6.40.1 and both work. Try upgrading the RouterOS to solve the issue.
Hi Fuad, thanks for your howto.
I tried it, with el Capitan on a Mikrotik Router. With both howto`s, for the router and the Mac.
I get the message,
The L2tp-VPN-Server does not respond….
in the Log on the mac i find:
Mon Mar 13 16:22:37 2017 : publish_entry SCDSet() failed: Success!
Mon Mar 13 16:22:37 2017 : publish_entry SCDSet() failed: Success!
Mon Mar 13 16:22:37 2017 : l2tp_get_router_address
Mon Mar 13 16:22:37 2017 : l2tp_get_router_address 192.168.0.1 from dict 1
Mon Mar 13 16:22:37 2017 : L2TP connecting to server ‘44.76.88.17’ (44.76.88.17)…
Mon Mar 13 16:22:37 2017 : IPSec connection started
Mon Mar 13 16:23:07 2017 : IPSec connection failed
Maybe you´ve got an idea.
Can you post the log in the Mikrotik side? Also make sure that you entered the correct pre-shared key.
Thanks for your reply,
Mikrotik Log says:
phase 1 negotiation failed due to time up
Firewall ist open for 500, 1701 and 4500
I have set up with both howto’s as well, but I cannot connect either. Did you ever get it working?
Thx