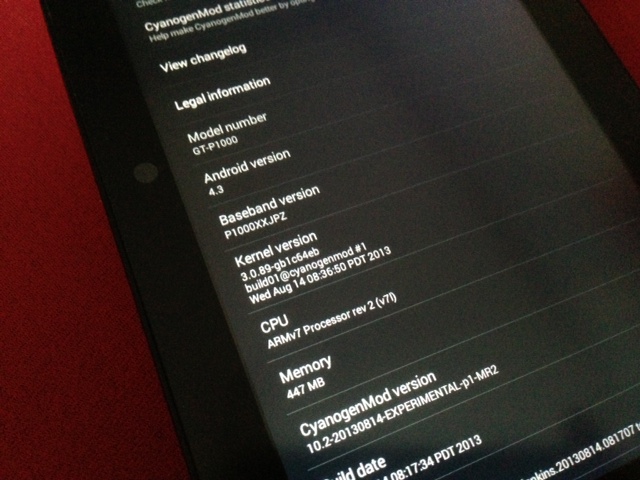
Glad to hear that my old Samsung Galaxy Tab P1000 (the first Samsung’s Tablet) received CyanogenMod 10.2 nightly build which is based-on Android 4.3 Jelly Bean. Although the tablet has been more than 2 years old with me (released on October, 2010 – almost 3 years ago), but the device runs flawlessly till now.
UPDATE: There is unofficial release of CyanogenMod 13 which is based-on Android 6.0 Marshmallow available to download. You can follow our tutorial on how to install CyanogenMod 13 on Galaxy Tab P1000.
UPDATE: CyanogenMod 11 based-on Android KitKat 4.4.1 for Galaxy Tab GT-P1000 is ready. Go to this post (Update Galaxy Tab P1000 to Android 4.4 Kitkat) if you want to jump to install Android KitKat on Galaxy Tab P1000.
Previously I had rooted the device using ClockworkMod and installed the CyanogenMod 10.1 custom ROM (Android 4.2.2 Jelly Bean). So if your tablet has not been rooted yet, try to search on how to do it.
This post show you how to upgrade/install/flash Galaxy Tab P1000 to Android 4.3 via CyanogenMod 10.2 custom ROM.
Download the following files
1. CyanogenMod 10.2 for Galaxy Tab P1000 from http://get.cm/?device=p1 (select the version 10.2-xxx.zip file)
2. Latest Google Applications (GApps) from http://wiki.rootzwiki.com/Google_Apps (http://goo.im/gapps/gapps-jb-20130813-signed.zip)
Flashing instructions
1. Copy the downloaded files to the SD card of the Galaxy Tab P1000. You can use USB cable or a software like AirDroid to copy the files from computer to the device.
2. Turn off the device then press & hold Volume Up + Power button to reboot into Recovery mode.
3. Inside the Recovery mode, create an Android backup of the current ROM. Select “backup and restore > backup“. This saved ROM is located in the SD card and can be restored anytime.
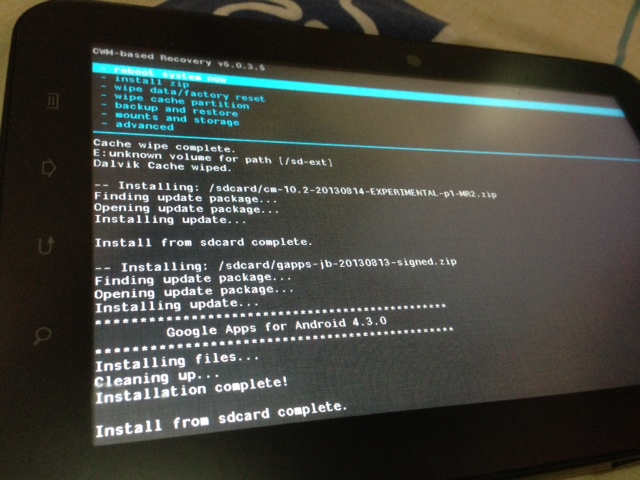
4. Perform a full wipe on your device. Select “wipe data/factory reset” then select ‘delete all user data‘. Then “wipe cache partition” select ‘Wipe Cache‘. Then, select “advanced > wipe dalvik cache” select ‘Yes — Wipe Dalvik Cache’ to confirm.
5. Return to the main menu then select “install zip > choose zip from sdcard” and choose the cm-10.2-xxx.zip Android 4.3 custom ROM you have copied earlier on the SD card. Apply the same method with the Google Apps package.
6. Once the installation is complete, go back to the main menu and select “reboot system now”
7. The device will reboot itself and may take up to 5 minutes to reach the home screen.

Viola! Your Samsung Galaxy Tab 7 GT-P1000 is now running Android 4.3 Jelly Bean thanks to CyanogenMod 10.2 custom ROM.

bro, tnx but.
After flashing this rom. My tab automatically got into bootloader. After a week later. it stick on bootloader. now i flashed 4.0 same there also. it is falling in bootloader after some days later.
does p1000r galaxy tabs have an update, because i cant find one., only for p1000 p1000n and p1000l pls reply. thanks
Galaxy P1000R is same with Galaxy P1000. By the way i’m using Galaxy P1000R 4.4.1 too.
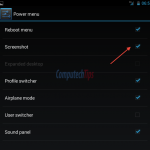
hello guys pls help after I update my samsung tab 10.2 the screeshot icon totally disappear,how csn I feturn nte screeshot icon thanks
Are you updating from the same 10.2 to the latest build or from 10.1 or before to 10.2?
yes I updating itfrom the same 10.2 latest samsung tab,but after I update the screenshot icon lost,how can I return it
Sometime it happens that a new update missing some features available in the previous version. If this is the case, revert back to the previous version / build (by reinstalling it via recovery mode)
Im so happy im using and 4.3.1 by cm,and the most iportnt is i can using 5 difrent camera from popular and phone…thx to u cm i mix lil bit rom n app result imy phone like a super phone but its alwys p1000 thx again cm
I can successfully update 4.3 OS in my Galaxy Tab GT P1000. I use it 2 days. after 2 days when i restart my Tab then my Tab is automatically restart again & again, Tab is not boot & not open. what can i do now?? Please help any one. :(
Its easy it happen to me many times,..just put ur phone in dmode n open odin click csc put original gtp1000 will be back to original 2.3.6,put back in dmode,install cmw..after that install back ur cm 10.2 dont wipe anythng just flh ur gapps reboot….ur done….hit me back…
U need costom frmware 2.3.6
Cmw
Cm 10.2 zip file
Last smile…
can i update from 2.3.6 ?
and it’s already rooted with 2.3.6
Hi joey, you should be able to update to 4.3 using this ROM.
It recomanded
hi ! i’m a chinese .can i use this rom ?is it with chinese language? thank u for helping me
Of course
Hi guys,
Can you help me to repair my IMEI on Samsung GT P1000, which changed to 004999010640000 after installing 10.2 ROM.
Thank you, in advance!
Its ok..just ignore that,if anything hppend on ur divice or anythng u wnt to claim from warranty just revert back to ori firmware
Hi guys, yes I’m sure about that I used cm 10.2 ROM. but now I’m using cm10.1 because of this issue. I’ll send u the cm10.2 roms links which I downloaded from different site but always facing same issue. I installed daily new cm10.2 ROM and hope ( now I didn’t face Skype issue ) but same. Then I reinsalled cm10.1. I have 10 files of cm 10.2 ROM in my sdcrd latest and oldest. All I used cm10.2 nightlie, experimental, stable. If possible send the link which u installed in ur galaxy tab p1000.
Hi, I am using the 10.2 ROM downloaded from official CyanogenMod website http://get.cm/?device=p1 (cm-10.2-20130814-EXPERIMENTAL-p1-MR2.zip)
Hi, guys thank u for reply! I checked the link which u post on or site its cm 10.1 link can explain me how can I update directly from ur link cm 10.1 to cm 10.2.
Plz reply me on my email address as soon as possible. Than you
No, I will reply on this thread. Thanks
I had already installed many Roms on my sgt-p1000 but every time same error Skype not work well it disconnect the call automaticly after 10 sec. This problem is only on cm 10.2 rom I also checked cm 10.2 nightlie, experimental, stable, but same error I also installed from different sites like xda, humberos, and others. But other software work great. And then i insall cm10.1. So plz tell me which one I install or what can I do foto out of this problem.
Hi sunny, thanks for dropping comment here. I am not that often using Skype call. Yeah there are some people complaining about Skype call that doesn’t work well on CM 10.2. Will test it first and come back shortly.
Hi guys. I don’t know if this is an issue but I installed 10.1 two days ago and now I notice it doenst charge the battery while the tab is on. it has to be off to take charge. is this a Rom issue or what?? I would like to upgrade to the 10.2 version but if this is an issue I better think twice. Please help me.
Even I didn’t experiencing this issue when it was on 10.1, but upgrading to 10.2 may fix the battery charging issue you’re experiencing with. My tab also has charging issue when on 10.1 but with different situation. When it was on 10.1, the tab could not be charged and set as storage when connected to computer via cable. the 10.2 fixes my issue.
I have tested both Skype voice (for 10+ minutes) and video (for 5+ minutes) call on Tab P1000 running CM 10.2 and used 3G/HSDPA data network without any problem. Are you sure that you were running CM 10.2 on GT-P1000 which automatically disconnected the call after 10 seconds?
Yes I’m sure about that I downloaded latest and oldest cm10.2 files like nightlie, experimental, stable, from different sites like humberos, xda, cynogenmod. But same issue if u don’t mind send me the link where u installed cm10.2 ROM in ur galaxy tab p1000. And tell me there is a no official cm10.2 ROM for p1000.
Hi sunny, I am using the 10.2 ROM downloaded from official CyanogenMod website http://get.cm/?device=p1 (cm-10.2-20130814-EXPERIMENTAL-p1-MR2.zip)
hi, so, can I install 10.2 nighties from 10.1 directly?
Hi marco, thanks for your comment. Yes, of course you can install 10.2 directly from 10.1. Just download the two files above and follow the flashing instructions!
Thank you, I see CM 10.2 is the experimental version… any issues ? CM 10.1 is rock solid and it works flawlessly ! :)
keep in touch!
Even 10.1 is still in experimental version http://get.cm/?device=p1 :) I’ve been running for 5 days without any issues so far. One cool thing found in 10.2 is it is now much easier to take screenshot / screen capture http://computechtips.com/563/take-screenshot-cm-10-2-android-4-3